Now that we have a private area, which grants access only to you, we can go and implement our newsletter admin panel.
Let’s list all the emails that were entered in Airtable.
We’re going to make a server-side generated page that lists them.
First we must fetch the list. We’re going to use the airtable library, like we did to add a new email.
If you remember, we used this code:
  table.create({
    "Name": name,
    "Email": email,
    "Date": date
  }, (err, record) => {
    if (err) {
      console.error(err)
      return
    }

    console.log(record.getId())
  })
Go back to your Airtable page, and click the “Help > API documentation”. Scroll all the way down to “List records”:
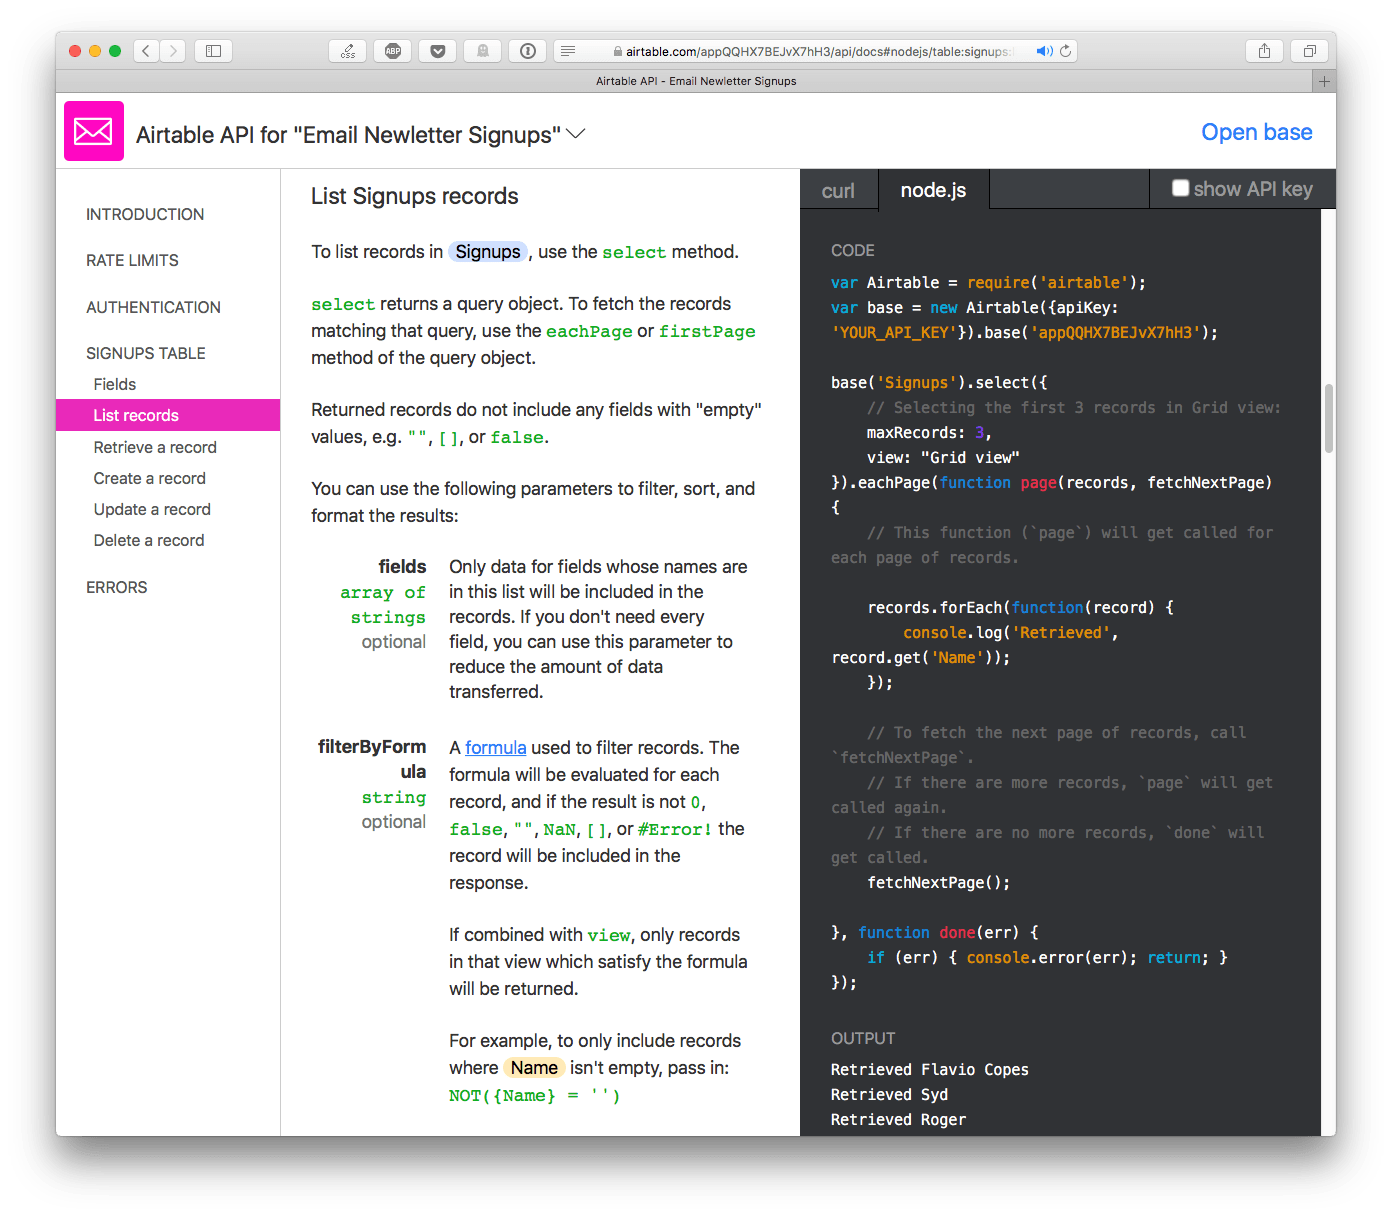
The right part of the page gives us a great example, which works great if we’re only interested in the first 100 page records:
base('Signups').select({
    view: 'Grid view'
}).firstPage(function(err, records) {
    if (err) { console.error(err); return; }
    records.forEach(function(record) {
        console.log('Retrieved', record.get('Name'));
    });
});
We need to handle pagination, though. We’re going to list all the emails in a single page, even if they are more than 100.
How do we do that? The documentation tells us we need to call the fetchNextPage() function.
We must build a recursive function, to call it until the records end, to fill the records array. We create a getAirtableRecords() function, which returns a promise:
let records = []

const getAirtableRecords = () => {
  return new Promise((resolve, reject) => {
    //return cached results if called multiple times
    if (records.length > 0) {
      resolve(records)
    }

    // called for every page of records
    const processPage = (partialRecords, fetchNextPage) => {
      records = [...records, ...partialRecords]
      fetchNextPage()
    }

    // called when all the records have been retrieved
    const processRecords = err => {
      if (err) {
        console.error(err)
        return
      }

      resolve(records)
    }

    table
      .select({
        view: process.env.VIEW_NAME
      })
      .eachPage(processPage, processRecords)
  })
}
The bulk of this is the airtable library API call:
table.select({
  view: process.env.VIEW_NAME
}).eachPage(processPage, processRecords)
Inside it, we’ll fill the records array one page at a time. The processPage() inner function processes each page, and at the end of it all processRecords() is called.
We’ll use the ES7 async/await syntax to load all the records synchronously:
const getEmails = async () => {
  records = []
  const emails = await getAirtableRecords()
}
Once we get the emails, we can get the data we want using map() to iterate and create a new, clean array:
const getEmails = async () => {
  records = []
  const emails = await getAirtableRecords()
  return emails.map(record => {
    return {
      'email': record.get('Email'),
      'name': record.get('Name'),
      'date': record.get('Date')
    }
  })
}
We can get the array of data from inside the /admin route callback:
getEmails().then(emails => {
  console.log(emails)
})
We want this data to be available in the admin.html template. How do we do that? How do we pass data to an Express template, and how do we use this data?
First, we change the file extension from .html to .pug to use the Pug templating language. Pug is the new version of Jade, and I ask you to look at https://flaviocopes.com/pug to get an introduction.
With Pug we can rewrite
<!DOCTYPE html>
<html lang="en">
  <head>
    <title>Join my list</title>
    <meta charset="utf-8">
    <meta http-equiv="X-UA-Compatible" content="IE=edge">
    <meta name="viewport" content="width=device-width, initial-scale=1">
    <link rel="stylesheet" href="/style.css">
  </head>
  <body>
    <main>
      <h1>Join my list</h1>
    </main>
  </body>
</html>
to:
html
  head
	  title(
    meta(charset='utf-8')
    meta(http-equiv='X-UA-Compatible', content='IE=edge')
    meta(name='viewport', content='width=device-width, initial-scale=1')
    link(rel='stylesheet', href='/style.css')
  body
    main
      h1 List of emails
Before we can use Pug we must install it. Add the pug library to the package.json file, and in server.js add
app.set('view engine', 'pug')
after initializing Express.
Now, in server.js find where you call verifyJWT(). In the callback, we have res.sendFile(__dirname + '/views/admin.html').
The sendFile() method just serves the file from disk without giving us the option to pass in data. We need to use another method here.
Switch to using a combination of Response.render() and Response.end(), and wrap it in the getEmails() successful promise resolution:
getEmails().then(emails => {
	res.render(__dirname + '/views/admin.pug', { emails: emails })
	res.end()
})
We pass the emails list as a parameter. Inside the admin.pug file we can get this parameter just by typing emails. Let’s use a loop to iterate on them, and create a nice table:
html
  head
    meta(charset='utf-8')
    meta(http-equiv='X-UA-Compatible', content='IE=edge')
    meta(name='viewport', content='width=device-width, initial-scale=1')
    link(rel='stylesheet', href='/style.css')
  body
    main
      h1 List of emails

      table
        for entry in emails
          tr
            td #{entry.name}
            td #{entry.email}
            td #{entry.date}
If you have some data in Airtable, the list will show up like this:
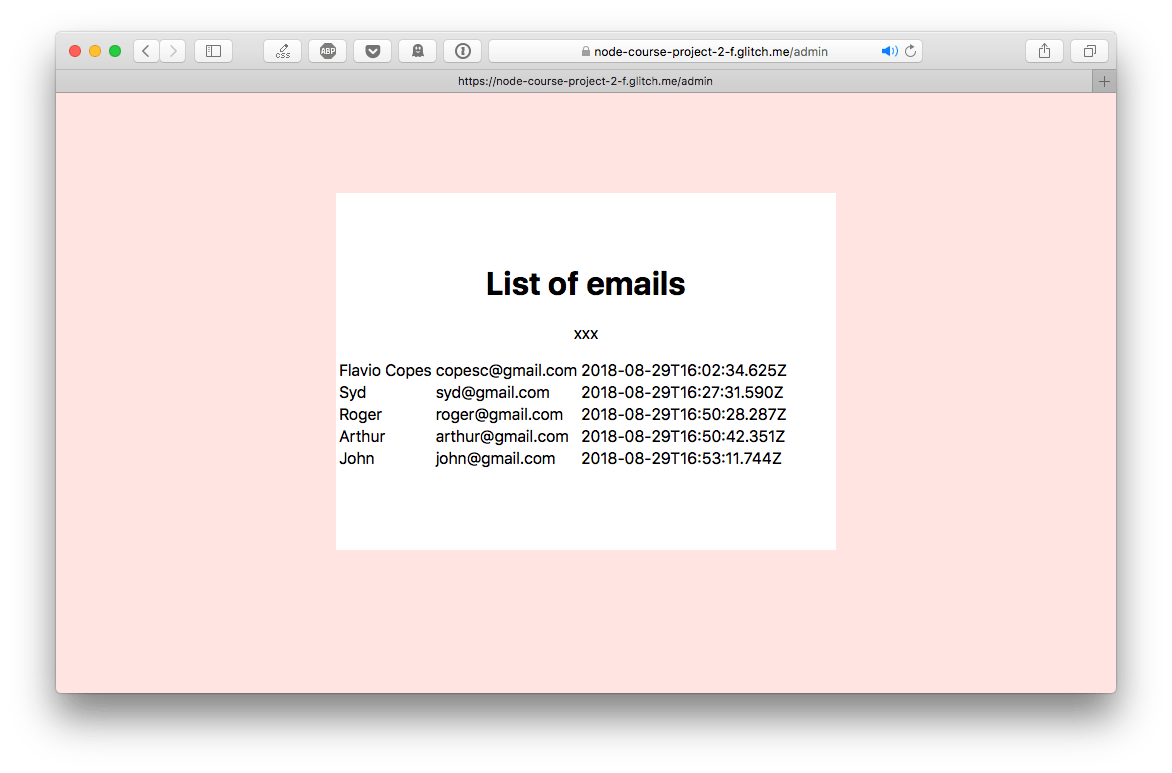
Pretty cool!
Let’s give it some CSS styling, to improve the presentation:
table {
  padding: 30px;
	width: 100%;
  -webkit-border-horizontal-spacing: 0px;
  -webkit-border-vertical-spacing: 0px;
}

tr:nth-child(odd) {
  background-color: lightblue;
}

td {
  padding: 8px;
}
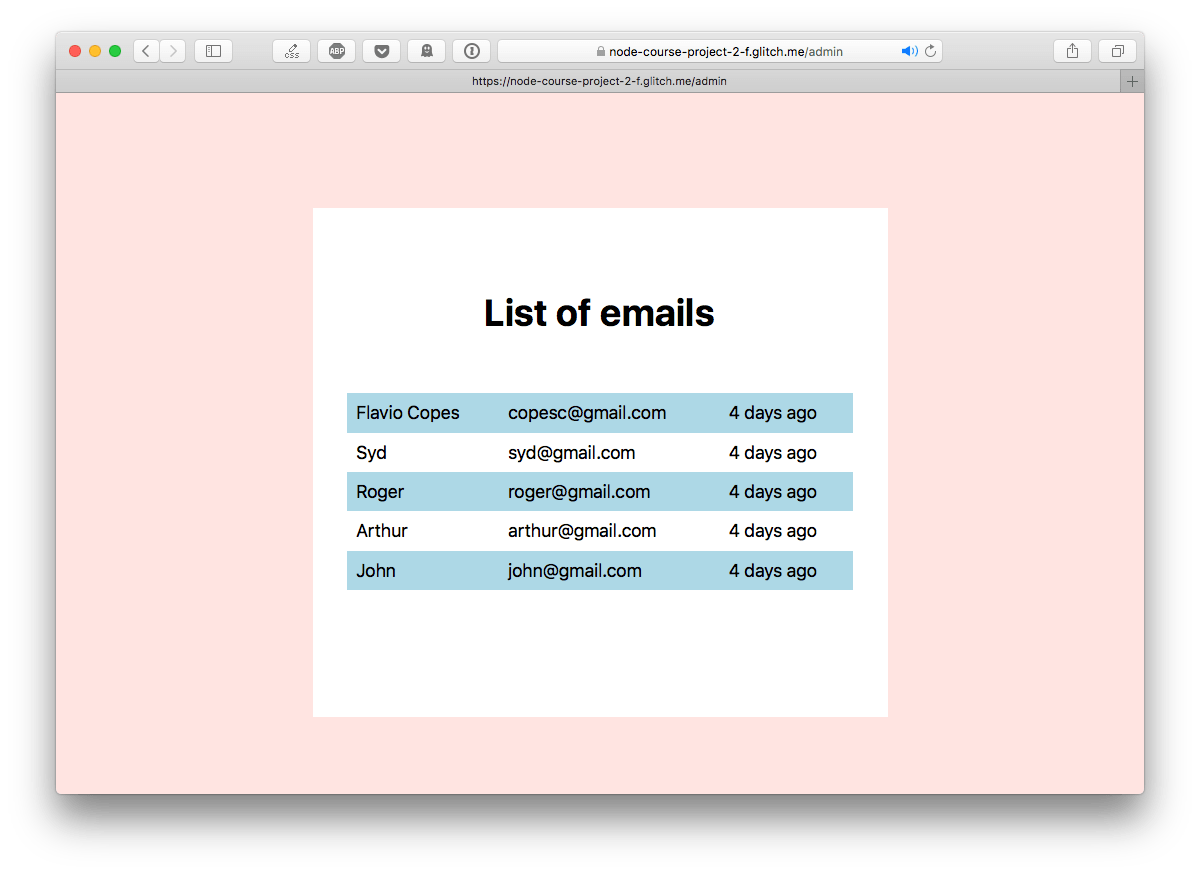
Things should look much better now:

There’s one thing missing now: the format of the date. It’s ugly, there’s too much information we don’t really care about.
Let’s make it prettier using the time-ago NPM package.
Add it to package.json and add
const ta = require('time-ago')
at the top of server.js.
Then change the getEmails() function to use the ta.ago() method:
const getEmails = async () => {
  records = []
  const emails = await getAirtableRecords()
  return emails.map(record => {
    return {
      'email': record.get('Email'),
      'name': record.get('Name'),
      'date': ta.ago(record.get('Date'))
    }
  })
}
This is the result now:
You can see this project live on Glitch :・゚✧