Enough with the Google Analytics configuration! We can start coding now.
In this lesson we’ll get the list of sites you have access to.
You can build this project using Glitch. Glitch is a great platform to experiment and build sample apps. See my Glitch overview post to know more about it.
We start from a blank canvas by clicking “New Project” and selecting hello-express.
There is some boilerplate code we’ll use later. Now open server.js and let’s focus on the Google Analytics authentication.
Add the environment variables
Add the client_email and private_key values you got in the JSON file to the Glitch .env file.
This is what it currently contains:
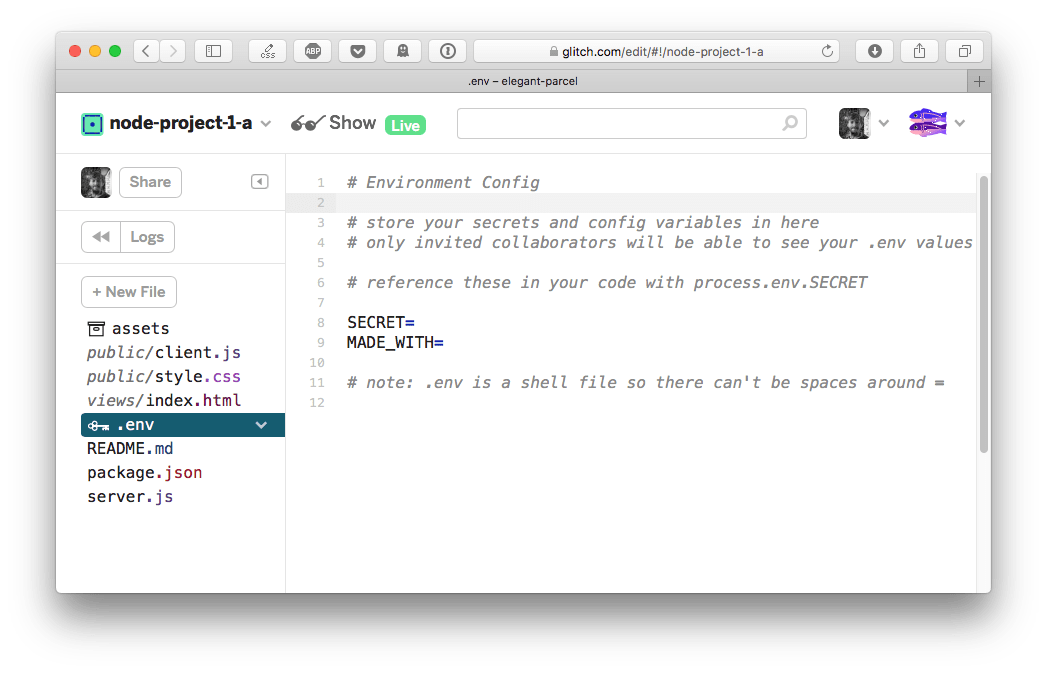
Create a CLIENT_EMAIL= entry, and a PRIVATE_KEY= entry, and add the corresponding value.
Example:
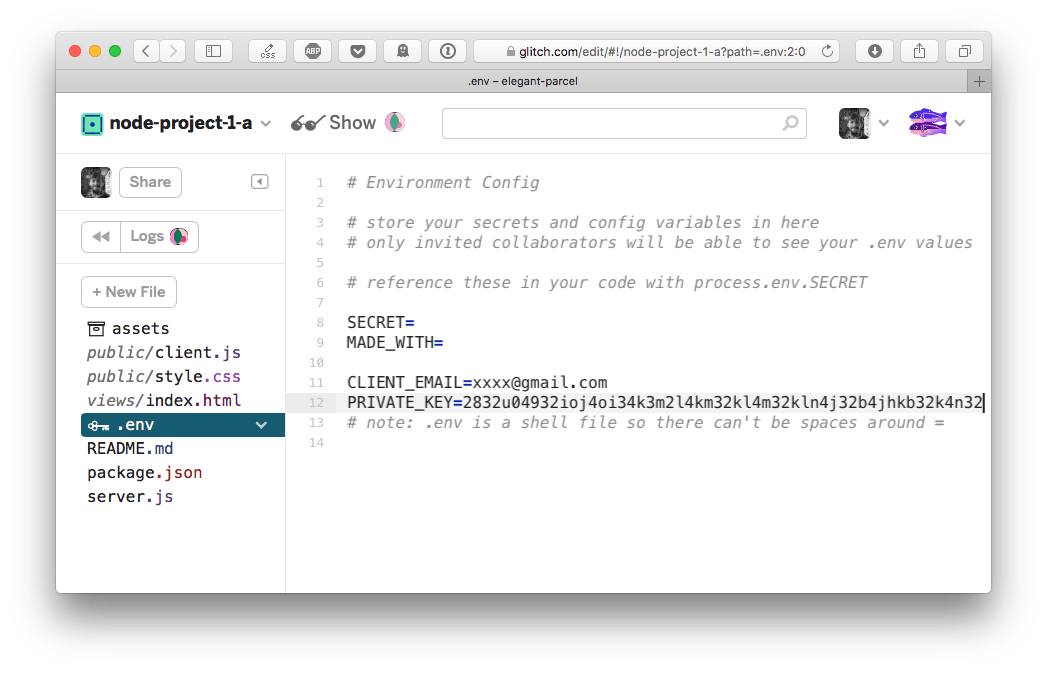
The PRIVATE_KEY value will be something very long. I found that to make it work on Glitch, you need to add a $ symbol and wrap it in quotes ('), like this:
PRIVATE_KEY=$'-----BEGIN PRIVATE KEY-----\nFRBvgIBISK..... VERY_LONG_THING.... .OapM8nr35NXjrDqF32joi4j32o4m32km4kl3m\n-----END PRIVATE KEY-----\n'
We also need one last environment variable: ACCOUNT_ID: your Google Analytics account ID.
Import the Google library
Google offers a great library to work with their API, conveniently called googleapis. We’ll use that.
First, add it to Glitch by opening the package.json file, and click the “Add package” button. You search for googleapis, click the package and it’s added to the project dependencies.
You can now require it in the server.js file. Freely remove all the other code that’s already present in that file.
const { google } = require('googleapis')
Remember the {} around the google object, as we need to destructure it from the googleapis library (otherwise we’d need to call google.google and it’s ugly)
Define the scope
We need to tell Google the scope of our usage. We only want to access the API in read mode, so we’ll use the analytics.readonly scope.
This line sets the scope:
const scopes = 'https://www.googleapis.com/auth/analytics.readonly'
Google Analytics API defines several scopes:
https://www.googleapis.com/auth/analytics.readonlyto view the datahttps://www.googleapis.com/auth/analyticsto view and manage the datahttps://www.googleapis.com/auth/analytics.editto edit the management entitieshttps://www.googleapis.com/auth/analytics.manage.usersto manage the account users and permissionshttps://www.googleapis.com/auth/analytics.manage.users.readonlyto view the users and their permissionshttps://www.googleapis.com/auth/analytics.provisionto create new Google Analytics accounts
You should always pick the scope that grants the least amount of power.
For example, we could use https://www.googleapis.com/auth/analytics but since we want to only view the reports now, we pick https://www.googleapis.com/auth/analytics.readonly instead of https://www.googleapis.com/auth/analytics.
Create the JWT
This code creates the JWT token.
const jwt = new google.auth.JWT(process.env.CLIENT_EMAIL, null, process.env.PRIVATE_KEY, scopes)
Notice how we can access the variables stored in the .env file by using process.env.
JWT stands for JSON Web Token, and it’s an open standard to create secure access tokens.
Once we got the token, we can pass it as part of a request, and we are able to confirm our identity to the server.
The code up to now
This is what we have:
const { google } = require('googleapis')
const scopes = 'https://www.googleapis.com/auth/analytics.readonly'
const jwt = new google.auth.JWT(process.env.CLIENT_EMAIL, null, process.env.PRIVATE_KEY, scopes)
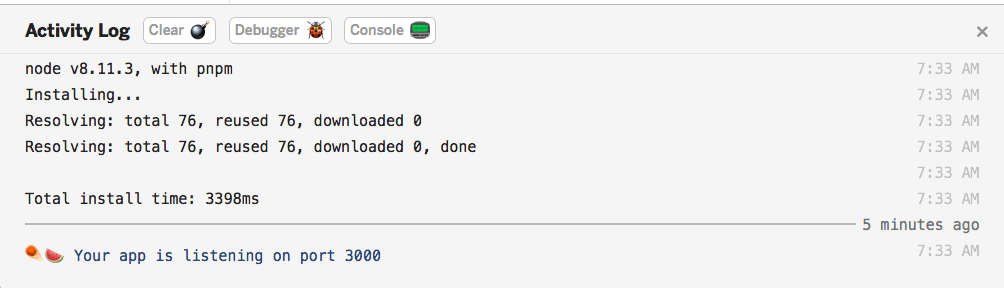
The code is already running because Glitch restarts the application every time a change is detected.
Open the logs by clicking the “Logs” button to find out what is happening:
Let’s perform the first request: get the names of all the properties you have access to
To do so, we create a function called getData().
We first call jwt.authorize(), and then we call the Google Analytics API, passing the jwt object, and our account id:
function getData() {
  jwt.authorize()
  google.analytics('v3').management.webproperties.list({
    'auth': jwt,
    'accountId': process.env.ACCOUNT_ID
  }).then(result => {
    console.log(result.data.totalResults)
  })
}
As you can see we call google.analytics('v3').management.webproperties.list(). How do I know that this specific method was the one to call? From the Google API documentation. This page https://developers.google.com/analytics/devguides/config/mgmt/v3/quickstart/web-js lists a few examples, including the one I used here.
We can transform the above code to use async/await. If you are not familiar with this syntax, read modern Asynchronous JavaScript with Async and Await.
Instead of appending a .then() method that is called when the promise is resolved, we use:
const result = await google.analytics('v3').management.webproperties.list({
  'auth': jwt,
  'accountId': process.env.ACCOUNT_ID
})

console.log(result.data.totalResults)
This syntax is handy because we use less functions and the flow of the program is always on the top level.
To be able to use it, we must also add the async keyword to the getData() function declaration:
async function getData() {
  const response = await jwt.authorize()
  const result = await google.analytics('v3').management.webproperties.list({
    'auth': jwt,
    'accountId': process.env.ACCOUNT_ID
  })

  console.log(result.data.totalResults)
}

getData()
Now, let’s get the names of the properties we can access. We now log the number of properties, accessible through result.data.totalResults.
result.data.items gets us the details of each property, as an array. We can use the map() array method to get the property names and IDs:
return result.data.items.map(item => { return { name: item.name, id: item.defaultProfileId }})
Check the project console for the list. This list will be the base of the sidebar list of properties.
WARNING: There is one problem I noticed when I tested this. Maybe the profile I was using was too old (it was my first site I added to GA), but the id property was undefined. We’ll filter out sites that have this issue, but definitely check if you have such a problem too, to avoid being tricked into having less visits than you think.
How can we do this?
return result.data.items.map(item => { return item.defaultProfileId ? { name: item.name, id: item.defaultProfileId } : false })
This means “create a new array, and include one entry only if item.defaultProfileId is not null or undefined. Each entry contains a name and id property”.
Here’s the full code at this point:
const { google } = require('googleapis')
const scopes = ['https://www.googleapis.com/auth/analytics', 'https://www.googleapis.com/auth/analytics.edit']
const jwt = new google.auth.JWT(process.env.CLIENT_EMAIL, null, process.env.PRIVATE_KEY, scopes)

async function getPropertiesList() {
  const response = await jwt.authorize()
  const result = await google.analytics('v3').management.webproperties.list({
    'auth': jwt,
    'accountId': process.env.ACCOUNT_ID
  })

  return result.data.items.map(item => { return item.defaultProfileId ? { name: item.name, id: item.defaultProfileId } : false })
}

async function getData() {
  console.log(await getPropertiesList())
}

getData()
The code for this project is available on https://glitch.com/edit/#!/node-course-project-analytics-dashboard-a?path=server.js:20:0